How to Install a Vent Fan in a Bathroom: A Quick Guide
The exhaust fan plays a critical role in safeguarding your bathroom against the harmful effects of steam-generated moisture. Therefore, learning how to install a vent fan in your bathroom is essential. Without it, the accumulated condensation on your bathroom walls and fixtures can lead to unsightly damage, such as peeling paint and rust, and facilitate the growth of hazardous mold and mildew.
By learning how to replace an exhaust fan in the bathroom, you can maintain a fresh and pleasant-smelling bathroom while also protecting your loved ones from inhaling toxic mold. This article will guide you step by step and prepare you for installing a toilet ventilator. Keep reading.
The Purpose of an Exhaust Fan: How It Works?
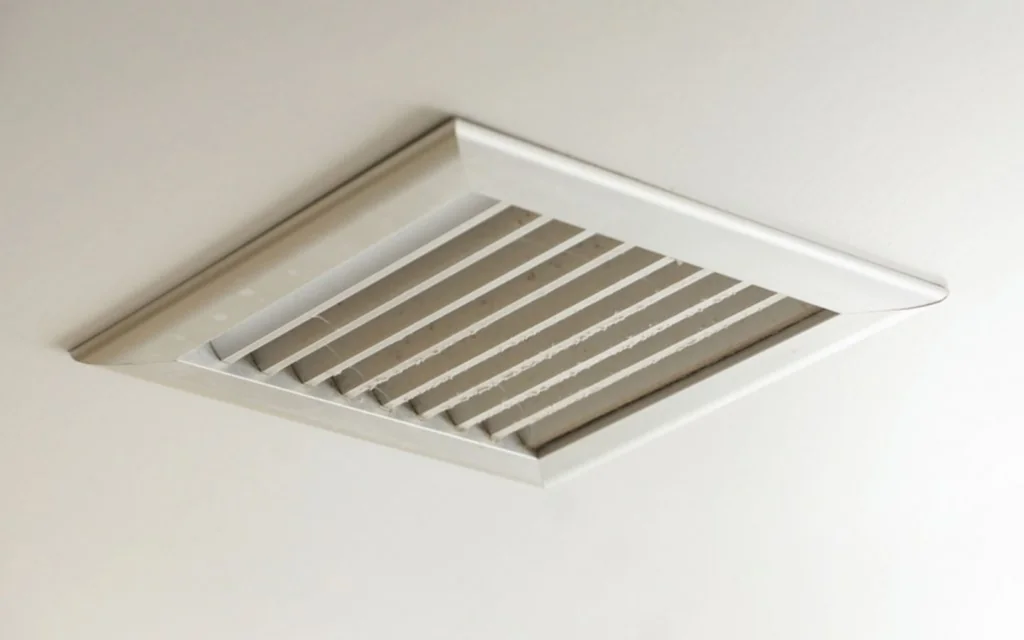
The purpose of exhaust fans is to remove warm and humid air from confined areas and permit the entry of fresh air. Upon activating your toilet blower, the steam-filled air resulting from a hot shower is extracted upwards and expelled from the room using a metal or plastic hose or duct concealed beneath the fan’s cover.
What Equipment and Materials Are Needed?

You will need some essential equipment and materials if you want to learn how to replace a vent fan in the bathroom. These items include a ladder of around 6 feet, safety glasses, and a dust mask. Additionally, a cordless drill and a 1/2-inch drill bit are required. A pencil, a reciprocating saw, and a drywall jab saw are other tools required for the task. You’ll also need a stud finder to locate the joists in the bathroom ceiling.
Furthermore, to learn how to install a bathroom exhaust fan from scratch, you will need a new toilet ventilator unit, 6-7 feet of flexible ducting, and a roll of aluminum foil tape. In addition, screws and a round wall vent or roof vent cap for the exterior are required for attaching the toilet blower to the joists. Last but not least, exterior-grade silicone caulk is required for a weatherproof installation.
How to Install a Exhaust Fan in the Bathroom: A Step-by-Step Guide
It’s time to start installing your toilet’s ventilator now that you have all the necessary materials. Follow these steps:
Step No. 1: Start with the Power Supply
The installation of the bathroom ventilator will take place on the ceiling. It is possible that you already have electrical wiring reaching the precise location where you plan to mount the toilet blower.
Depending on your local electrical regulations, you may be able to link your toilet lighting circuit to the ventilator. Typically, the toilet lighting circuit powers the ceiling light.
If your local code necessitates a dedicated circuit for the ventilator, you may need to install a new cable from the service panel to the toilet ceiling area. If you lack the expertise or confidence to establish new circuits and operate the service panel, it is best to engage an electrician to carry out this task.
Step No. 2: Find the Ventilation Point
If you are serious about learning how to put an exhaust fan in a bathroom, this step is essential. To ensure proper ventilation, the air exhausted by the fan must exit outdoors. Therefore, it is necessary to install a duct running from the ventilator to the roof or a side wall. If feasible, choose to route the flexible ducting to a wall instead of the roof to avoid shingle work and potential roof leaks.
Ideally, select a vent location that creates a direct path from the ventilator to the exterior and is within 6 feet of the bathroom ventilator to the exit point. The vent should be installed inside the restroom and positioned near the shower, tub, or shower/tub combination, as this area generates the most humidity. To maintain optimal airflow, the duct leading from the vent should be as straight as possible, avoiding sharp bends.
Step No. 3: Create the Exterior Vent Cut

To get ready for the exterior vent, determine whether you need to access the wall or roof of the house. You will need a round vent or vent cap, as well as a reciprocating saw, cordless drill, pencil, and silicone caulk.
Place the round vent or vent cap across the locator hole and use the pencil to trace a circle where it will fit. Begin cutting with the reciprocating saw, using the locator hole as a starting point for the blade.
For roof exhausts, you should slide the flashing of the roof cap under the shingles around the midsection of the vent opening. This ensures that the installation is secure and waterproof. You may need to remove some shingle nails and cut the surrounding shingles to properly fit the roof cap.
Step No. 4: Create an Interior Opening
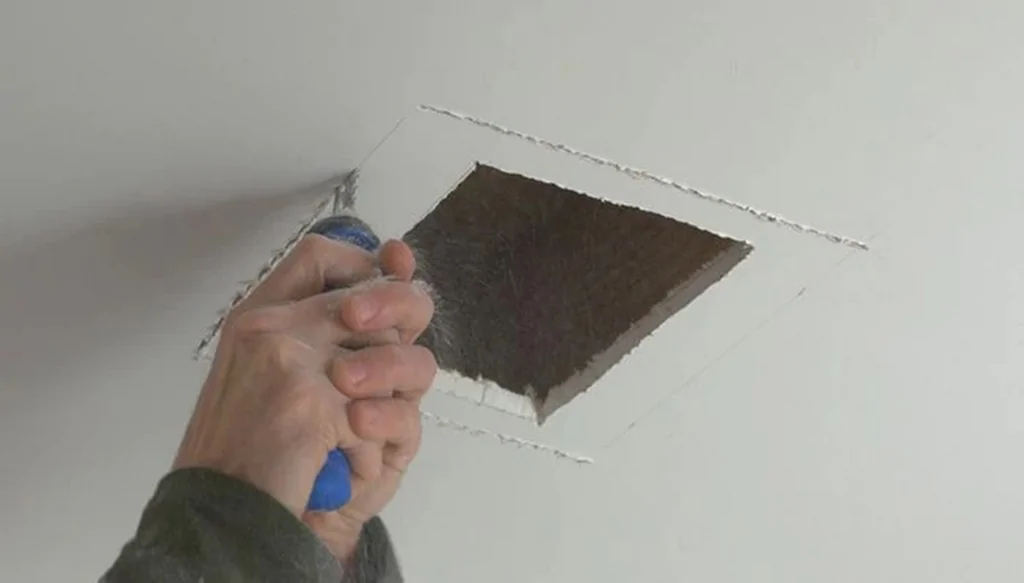
Now it’s time to mark the joists in the bathroom ceiling with a pencil. If the fan includes a paper template, use it to mark the fan’s intended location in the ceiling. Most toilet fans attach directly to the side of the joist. As a result, when marking the cut lines, align the template or housing parallel to a joist.
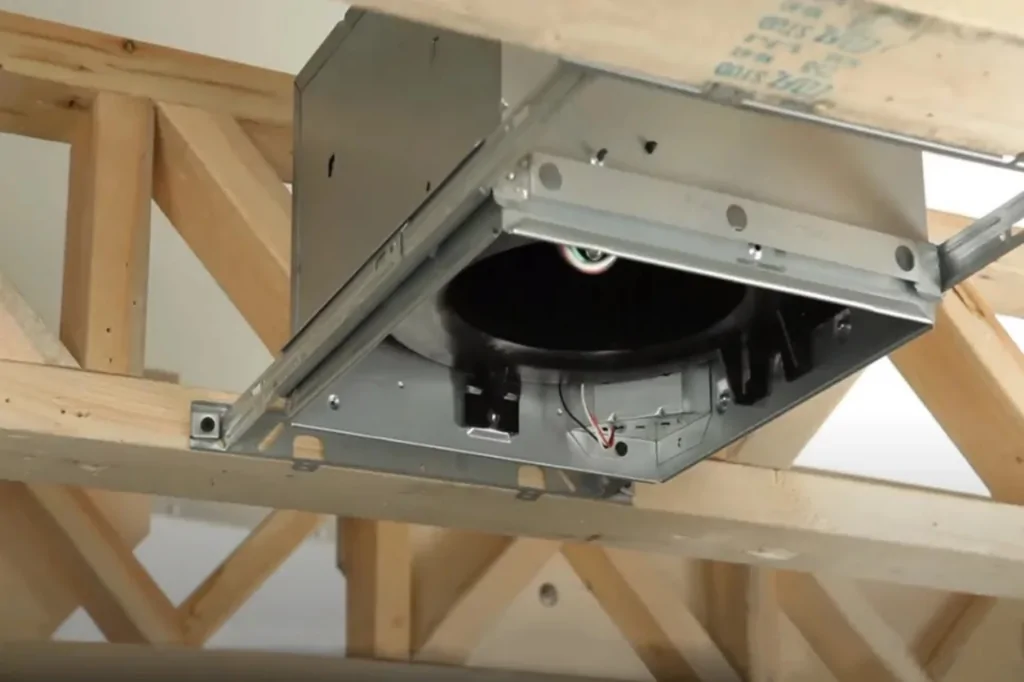
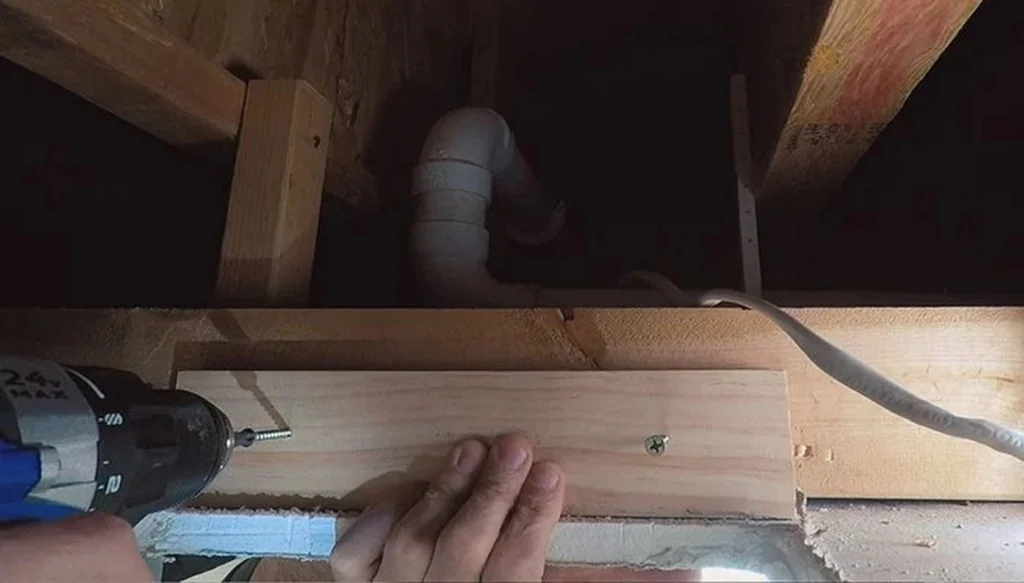
Step No. 5: Mount the Bathroom Fan to the Ceiling Joist
In the attic, bring the fan housing, screws, light, and cordless drill. Have a partner assist in placing the ventilator in the hole so the bottom is flush with the ceiling. Screw the ventilator into the joist’s side using the drill, or use suspension brackets. In the attic, thread the electrical wire through the housing’s side, extending approximately 7 inches into the housing.
Step No. 6: Routing the Bathroom Fan to the Exterior
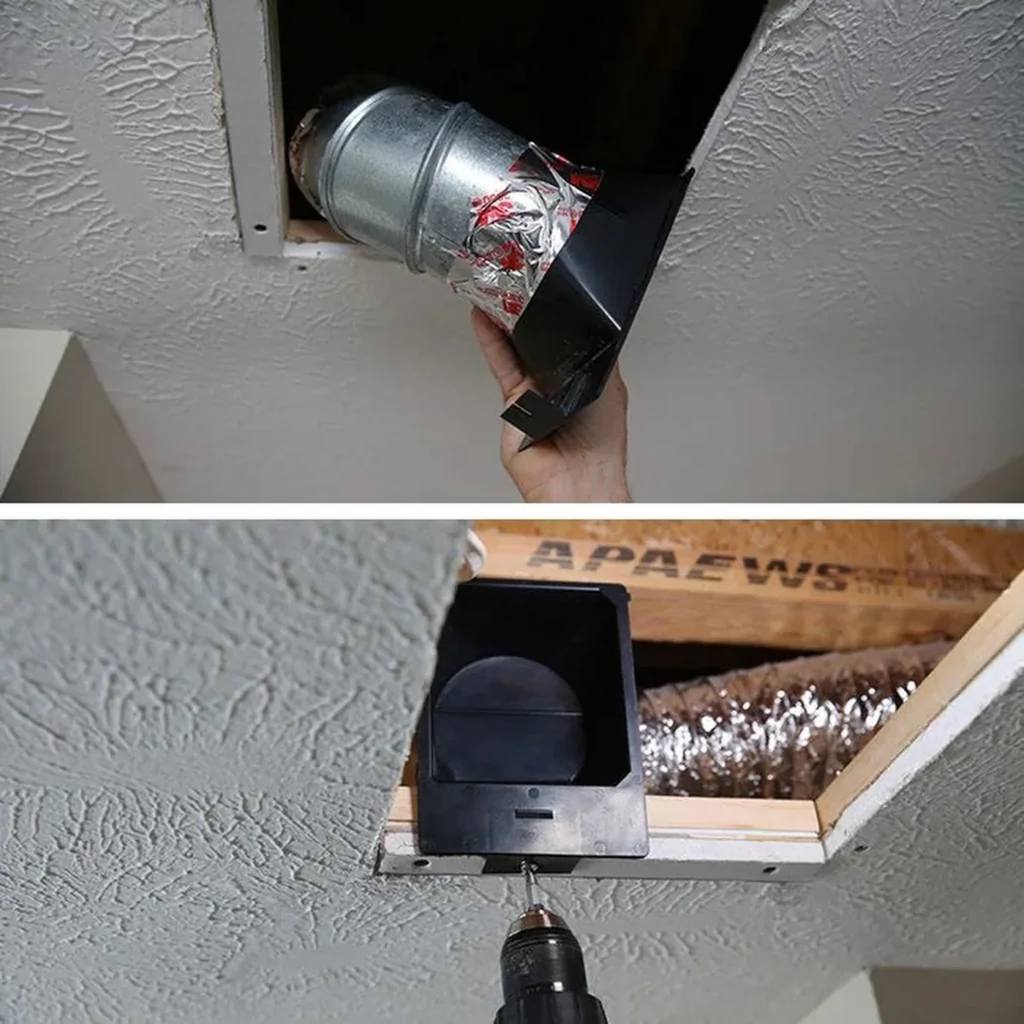
After verifying the vertical placement of the fan in the toilet, collect the flexible ducting and aluminum foil tape, and head back to the attic. Use foil tape or mechanical fasteners to attach the flexible tubing to both the ventilator and the vent. While doing so, ensure that the tubing is installed in the most direct and smooth way possible.
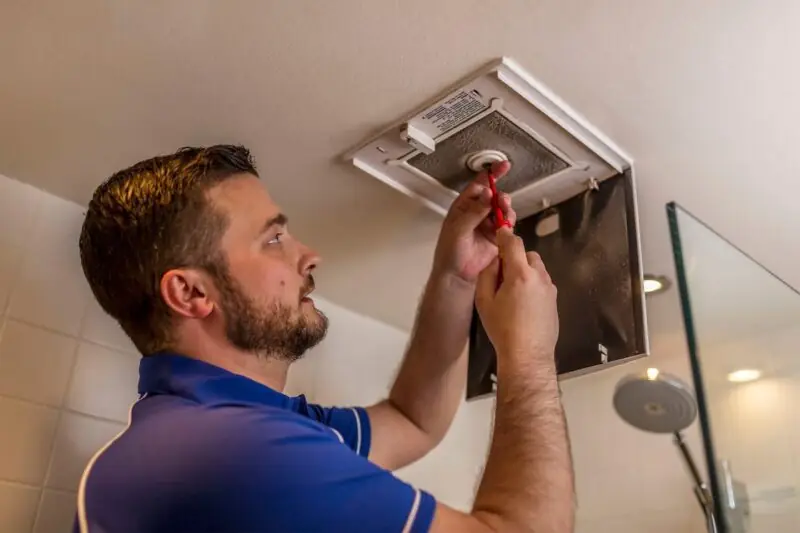
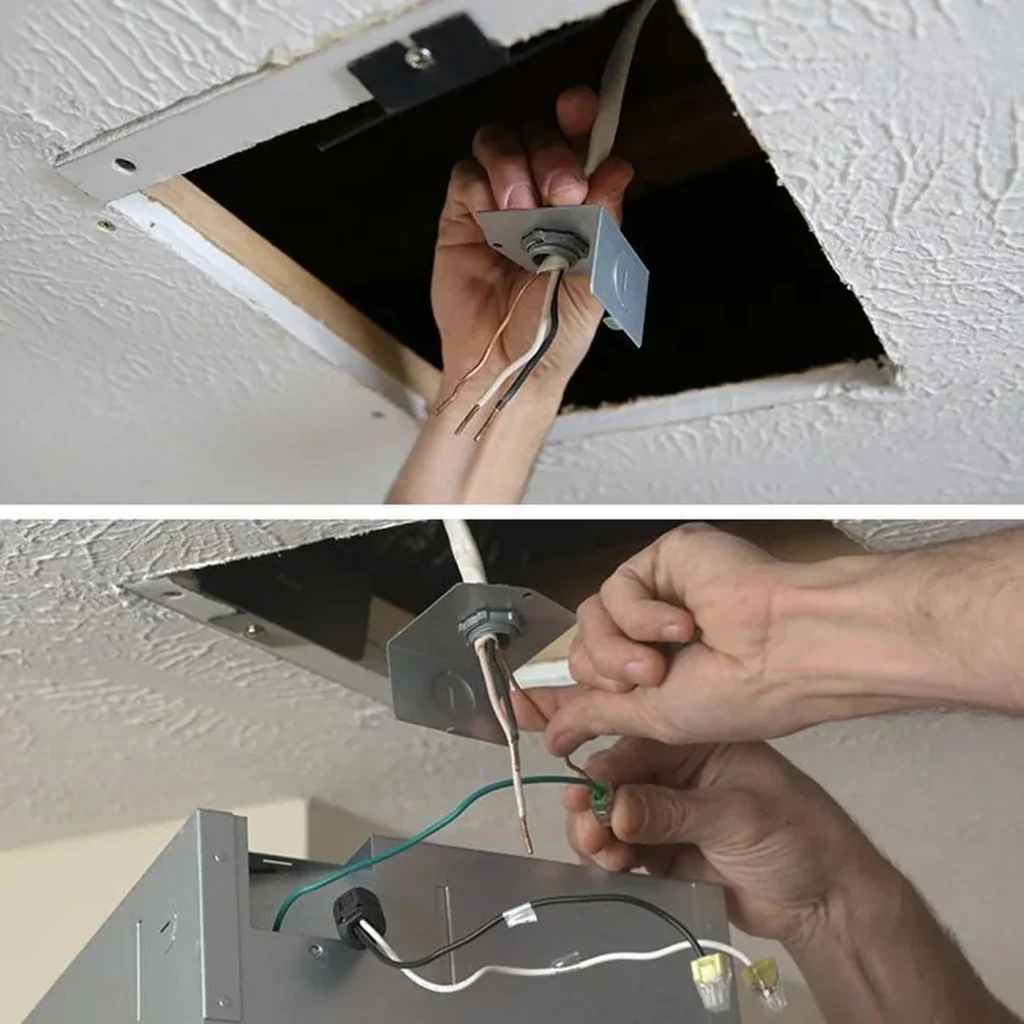
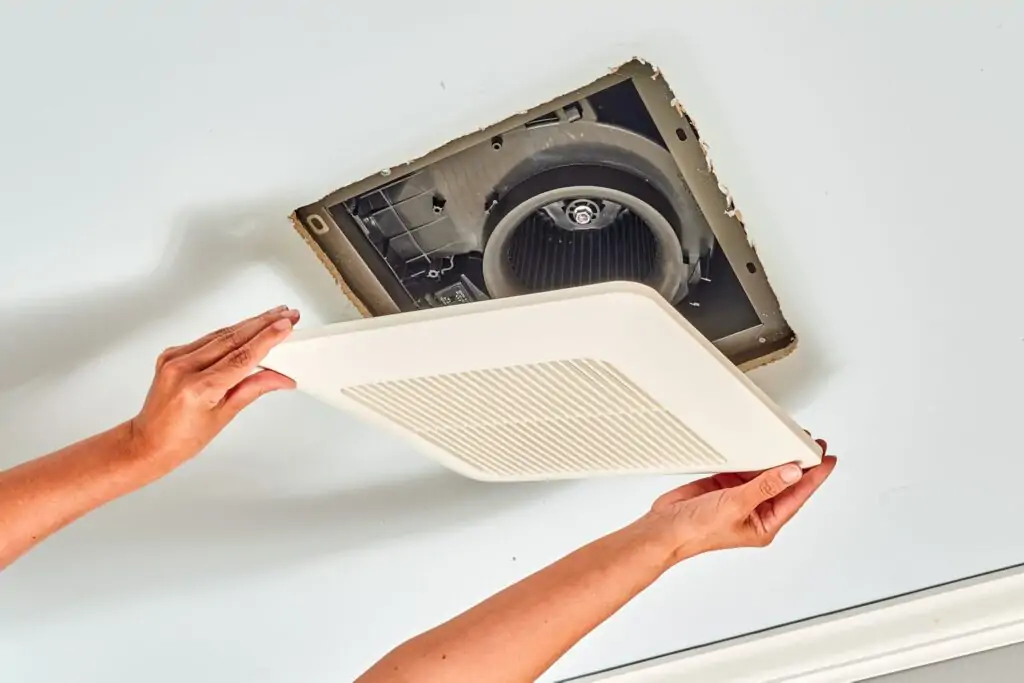
Step No. 7: Connect the Bathroom Fan to the Housing
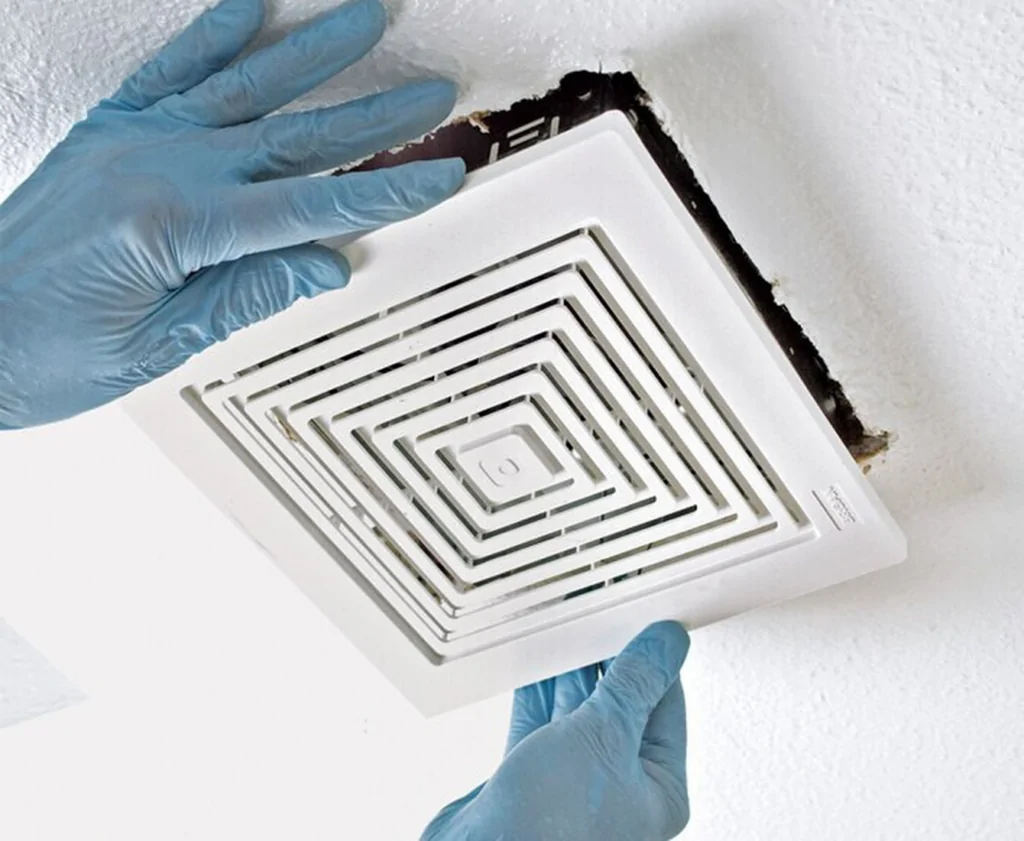
Insert the ventilator unit into the housing and hard-wire the electrical wires per the manufacturer’s instructions. Ground the ventilator with bare or green wire. Attach the ventilator grille to the housing. Restore power and test the ventilator by turning on the switch.
Bottom Line
By following the steps mentioned in this article, you can quickly learn how to install a vent fan in a bathroom. Still, if you don’t have enough experience and are not sure that you can manage on your own, you can hire a professional service to do these tasks for you.