How to Build Decking (Step by Step Guide with Pictures)
Read this article to find out all there is to know about how to build decking. A deck can be an excellent addition to your house. It’s a perfect place for an outdoor kitchen, spending time with your family and friends, or just drinking some coffee all by yourself in the morning. The decking will also increase the resale value of your house. Building the decking doesn’t necessarily have to be a grueling and expensive task. If you divide your project into smaller steps and take your time, it will make the process easier for you and your wallet and leave less room for mistakes.
When to Build a Deck
If you want to build the deck by yourself, start the construction in the late spring. This will give you more than enough time to finish the project before winter arrives.
If you plan to hire professionals, you can arrange this job for early autumn.
Cost of Building a Deck
The average cost of building a deck is $12.000. The cost can be as low as $2.000 at the lower end or as high as $22.000 at the higher end. If you want to save some money, you can build a smaller deck using pressure-tested wood and assemble it yourself. A professionally built 300 square feet deck, made of composite materials, with stairs and railings will cost around $14.000. At the top end, you can order a deck made from tropical hardwood species as ipe, which can cost twice as much as other options, due to its relative rareness and specific mounting requirements.
These prices may vary due to the rising prices of lumber, so first of all, check your local hardware store for the latest prices.
1. Planning and Preparation
Choosing the location is the first step in designing the decking. Do you need sunlight or shade? Do you value privacy? How much space do you have? How will it fit with the house? These are the factors you should consider when choosing a location. You should be able to access the deck with ease, either through a back or side door.
The size of the deck will be determined by its main purpose. If you want to throw large parties, you will need a bigger deck, whilst a smaller one will be more than enough if you just want to relax or read a book. We have some ideas on how to make even a small deck look inviting.
When you have chosen the location, measure its area and make sure there are no utilities or pipes beneath. Check online with the local authorities for possible rules and limits and find out if there is a required permit.
2. Choosing Materials
Material for a deck has to be water-resistant and extremely durable. It should also be resistant to any house pests, such as mice and insects. Here are some good types of materials you can use:
- Tropical Hardwood: the most popular choice is ipe. Tropical hardwoods are known for their hardness and density. For protection, you can use oils.
- Pressure-Treated wood: they are cheap, easy to work with, and readily available. They are coated in chemical preservatives, so it’s not recommended to walk on them barefoot.
- Composite Materials: Made by combining wood and plastic fibers. They are very low maintenance and you won’t need to use any staining or coating. The downside is that they are susceptible to bending, so you will have to decrease the spacing of the joints.
- Regular wood: Western Red Cedar or any redwood is a great choice. Cedar contains compounds called “thujaplicins”, that act as natural preservatives. Due to its low density and consistent grain, cedar is less likely to warp and twist than other soft and hardwoods. You can also apply a wide range of finishes since cedar lacks the resin that is found in other softwoods.
Any screws or nails you use should be made of stainless steel or galvanized metal.
3. Designing The Deck
Every deck consists of:
- the footing
- beams or any horizontal support
- posts
- joists
- the decking
- finishing details (railings, stairs, pergola, etc)
The spacing of the beams and posts is determined by the material you used.
4. Laying Out the Deck
The first step is to measure the height of the deck. It should be 2-4 inches lower than the floor of the house to prevent water from entering the building. Fasten the string at the desired height and pull it across the house for the length of the deck. Fasten the string at the other end and connect both ends to stakes.
The length of the string should be more than the desired size of the deck to leave room for adjustments. Connect stakes to make a parallelogram that will be used for the construction of the base of the deck.
The base should always be a square, even if the decking is round. To make sure all the angles are 90 degrees you can use the 3-4-5 technique.
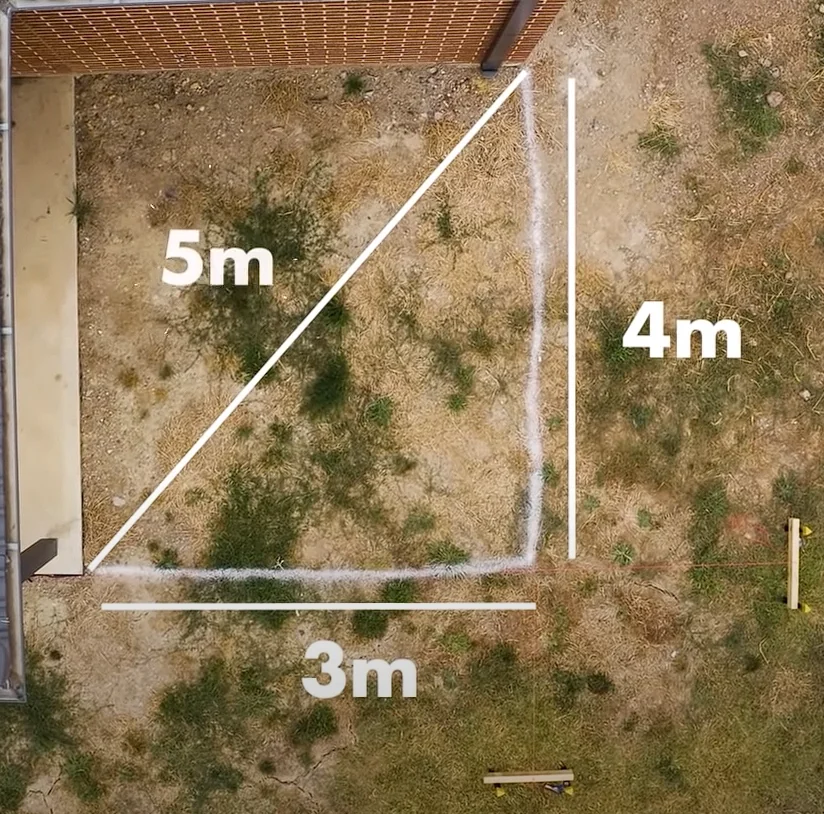
Go into the corner, measure 3 meters (or yards) in one direction and measure 4 meters (yards) in the other direction, then measure the distance between those 2 points. The distance should equal 5 meters (yards) for it to be a square corner. Do this on the opposite corner to make sure the base is a square. You may lay a black polyethylene film and gravel under the base to prevent any weeds from growing.
5. Constructing the Deck
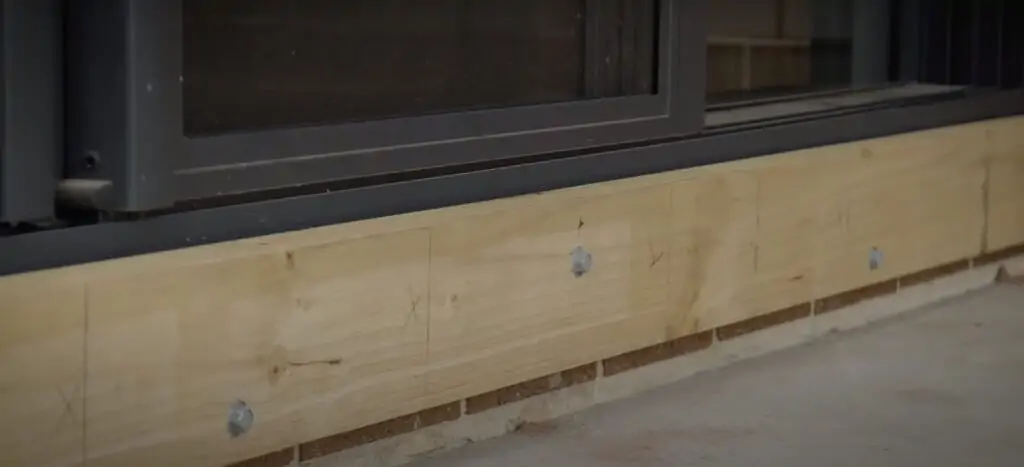
First, you will have to install a ledger board to support the frame, since it’s fastened to the building. Put the ledger board against the house and make sure it’s set a bit lower than the marked line to leave enough space for the flooring. When you’ve made sure it’s level, nail it in place, and make sure it is still level. Use ⅜-inch nails that are at least 2 inches longer than the thickness of the board.
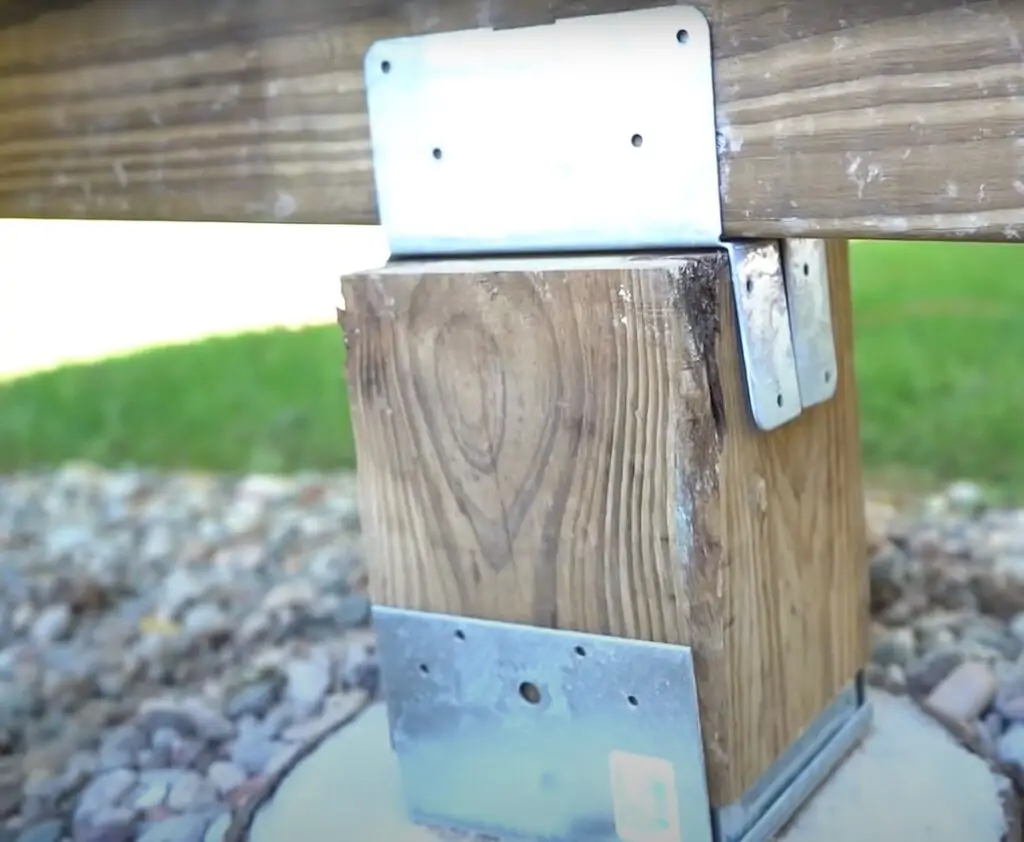
Now you can start installing the footings. They are required to support the posts. Check local building codes for any rules about the types and sizes of the footlings. The best option is to make concrete footling by yourself. Dig holes that extend beneath the frost line. In most soils, it is as deep as 2 feet. Add about 3 inches of gravel at the bottom of each hole. Mark the concrete tubes to the depth of the holes and add 2 extra inches and cut them. Mix the concrete in the wheelbarrow using a shovel or rent a concrete mixer. Put concrete tubes and pour the mixed concrete. The tops of the footings should be above the ground to keep the water away from the posts.
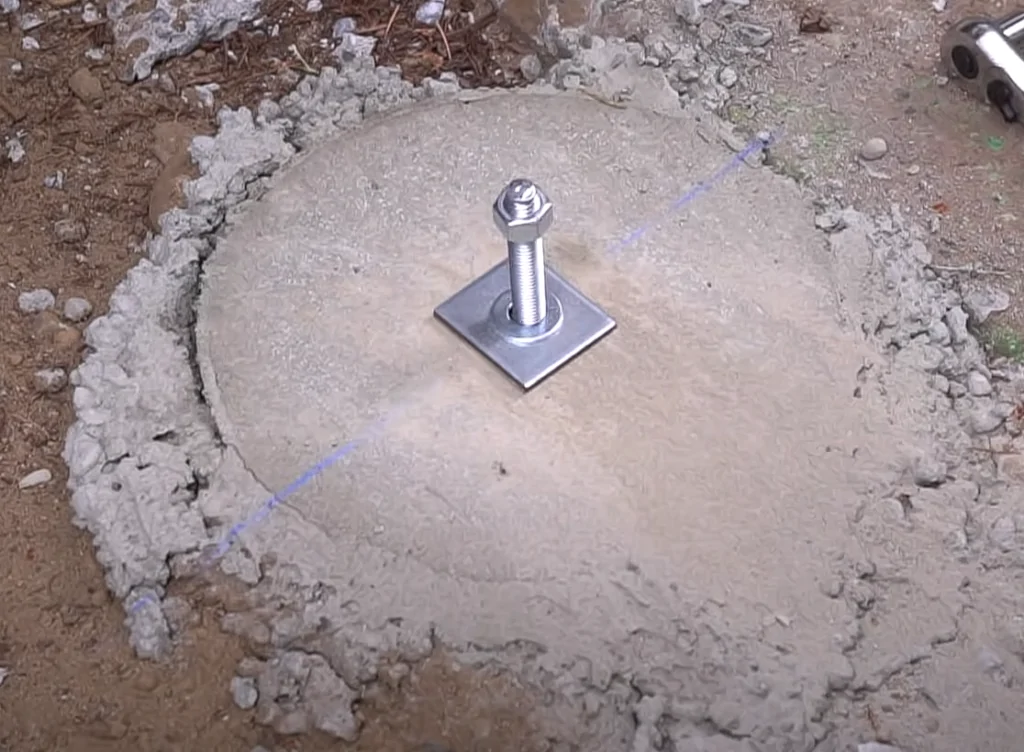
Install post anchor bolts into the footlings 1 inch above the concrete and attach post anchors.
To determine the required height of the posts, run the line from the top of the leader board to a stake parallel with the footings. When you have made sure it’s level, lower the string at the stake for an inch, to make the deck slope slightly for drainage. Subtract the width of the boards for the decking from the distance between the footings and the string to get the height of the posts. The base of the posts should be 6×6 inches.
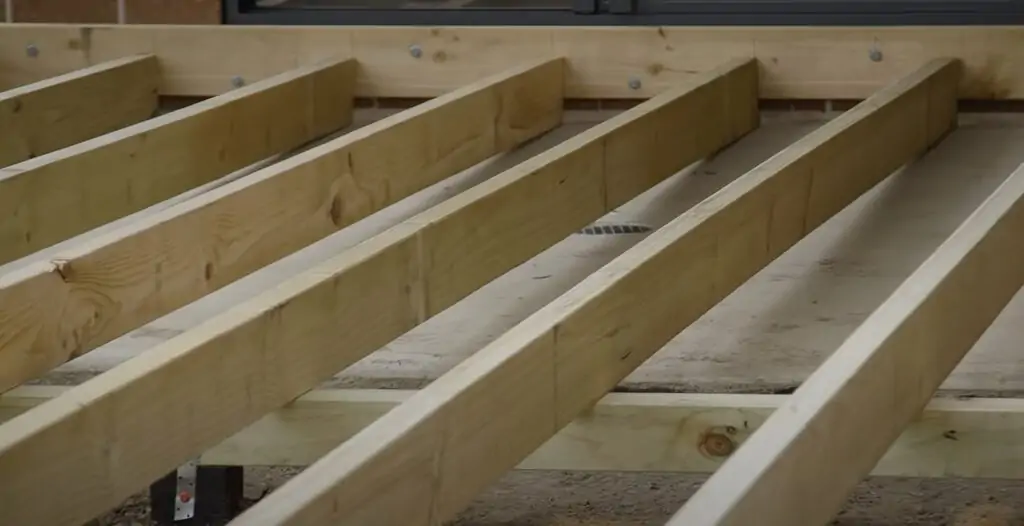
Make the beams by nailing 2 2” x 8” planks together using galvanized nails. Lay them across the posts perpendicular to the ledger board. Secure them to the posts using brackets and galvanized screws. When you have made sure the beams are square, nail them in place. This will be a foundation for the frame of the deck.
The next step is to lay out the joists. They should be 16 inches apart. Lay the first joist right next to the house and start marking the spots for the other joists by putting an “x” on the beams. The center of the boards should be right on the “x”. Secure them to the beams by using hurricane brackets and nails. Add the blocking beams between the joists to give them some extra rigidity. Make a line on the edges and trim the joists to make them square.
Nail the temporary support blocks under the joists to help support the rim joist before nailing it into place. Attach all the joists to the rim joists using joist hangers. Once you level the rim joist, nail them to the other joists and remove the support blocks.
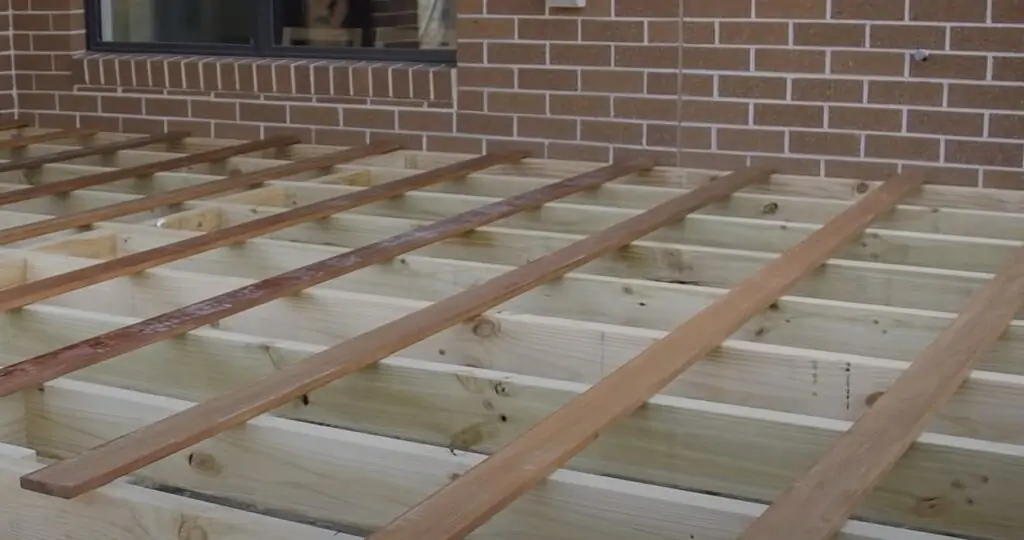
Now it’s time to add the decking. Predrill two holes for the crews on the joist closest to the house to prevent splitting and without drilling put 2 screws in every other joist. Every fourth joist check if the boards are still square. Add ⅛ inch gap between the boards to allow rain and dirt to escape. Once you placed all of the boards, install a decking skirt all around the frame.
Additional Finishes:
You should always add at least a few of these suggestions since they add character and safety to the deck.
1. How to Build Decking Stairs
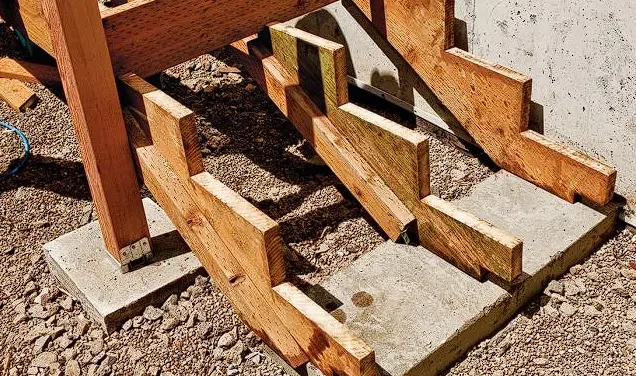
If you want to add stairs, and you don’t know how many of them you need, divide the height of the deck (in inches) by seven, and you will get the necessary number of steps you have to build. If the quotient is not a whole number, round it up to the closest integer. Divide the height by the number of steps and that will give you the rise of the deck. Divide the rise into 75 to get the length of the steps. Cut the stringers to the desired length and attach them to the side of the deck by using nails and angled brackets. The usual width of a staircase is 36 inches, which means you will need 3 stringers that are 16 inches apart. Use screws to attach the steps to the stringers.
Add a concrete base beneath the stringers to add stability. If you have more than 2 steps, most areas demand that you add railings. To do that, dig 2 holes at the bottom of the stairs on both sides about 16 inches deep. Then mark the posts at the desired height and add 16 inches to compensate for the depth of the hole.
Pour in some concrete and set the post into the hole and step the ground around it to fix it in place. Cut the top of the post at a 30 degrees angle and connect it to the rest of the railing.
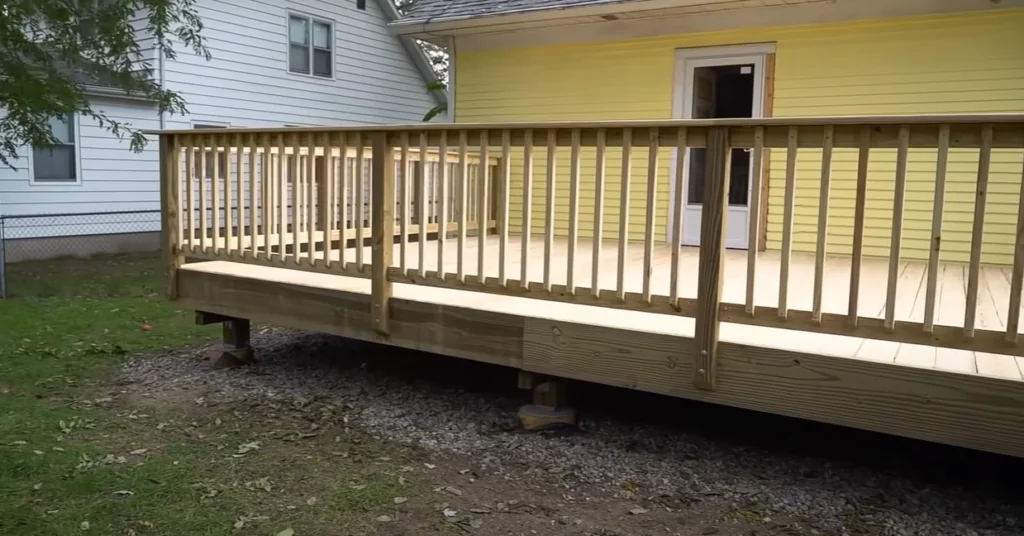
2. How to Build Decking Rails
If your deck is high enough to have steps, you need to install the railings to prevent any falls.
Begin by putting the corner and stair posts. Attach them to the decking with glue, then secure them with carriage bolts. The rest of the railing can be attached as individual parts or in premade segments. Measure the distance between the posts to get the length of the rails.
The vertical spindles should be around 4 inches apart and evenly spaced along the railing.
Attach them to the rails with nails or screws. The rails in the corner should be cut at an angle for easier assembly. Attach the rails to the post by using angle screws.
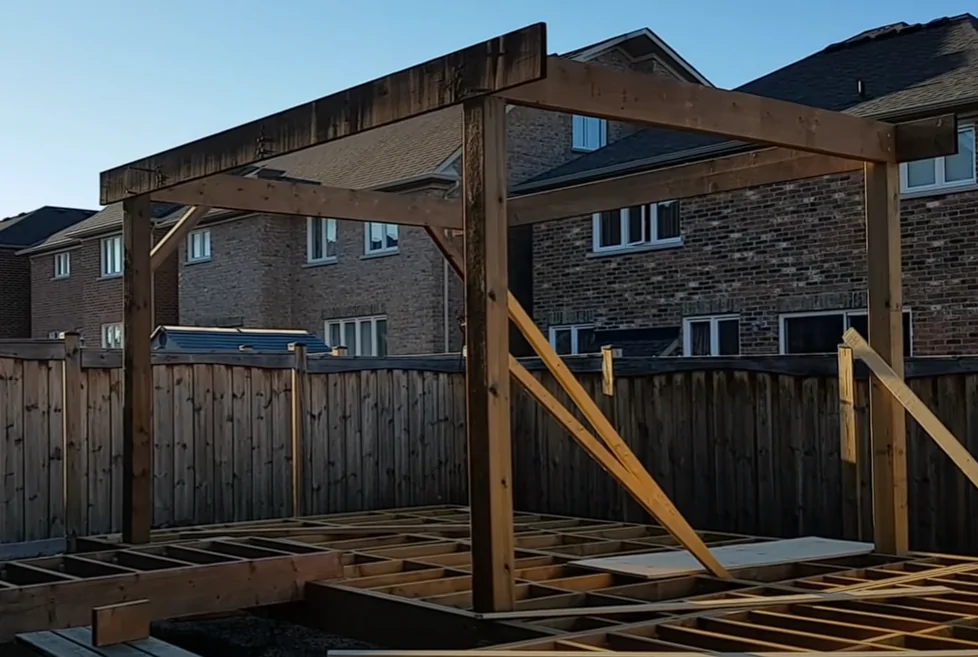
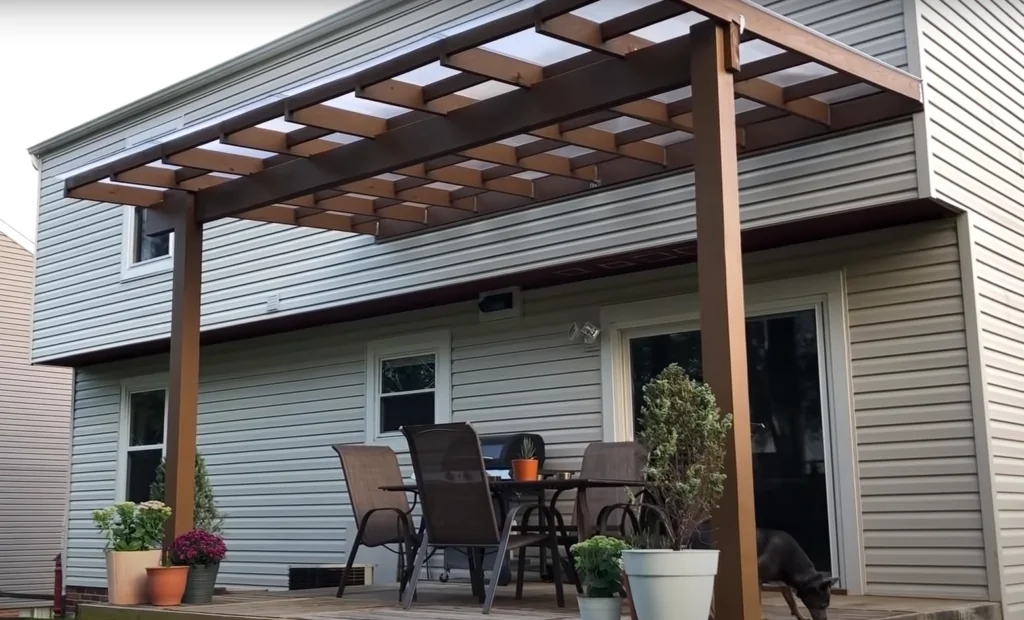
3. How to Build Decking With Pergola
If you want to build a pergola above your decking, the first thing you should consider is its weight. If the frame of the deck was done properly, you won’t need any additional footings for the pergola.
In some places, strong winds can be a problem. Be sure to secure the poles with extra screws.
Attach the poles to the flush beam of the decking with 12-inch carriage bolts and add additional temporary support for the beams. Then place 2 wooden boards to connect 2 pairs of beams and secure them with carriage bolts.
Cut the beams at the top so you can fit another 2 wooden beams to make a square at the top. Attach them with angled screws. You can add boards on one side of the pergola to add decorative details and as a protection from the wind. And finally, decorate your pergola with lights.
4. How to Build Decking with Roof
Choosing the material for the structure of the roof is important. It should be inexpensive, strong, and durable. OSB (Oriented Strand Board) and plywood are the most common choices.
- Start by installing post-base connectors and attaching support beams to them.
- Install a header board on top of the beams using thru-bolts for a strong connection.
- Attach a ledger board to support the rafters. You can secure it by simply nailing and screwing it to the house.
- Cut the rafters at the angle of the roof pitch and lay them out. The roof must be at an angle for drainage. Nail them in place to the ledger board, and attach them to the header using framing nails.
Lay any water-resistant roof sheathing over the rafters. If you are building a larger roof and live in an area where it snows heavily, you might want to install more footings for the support of the deck.
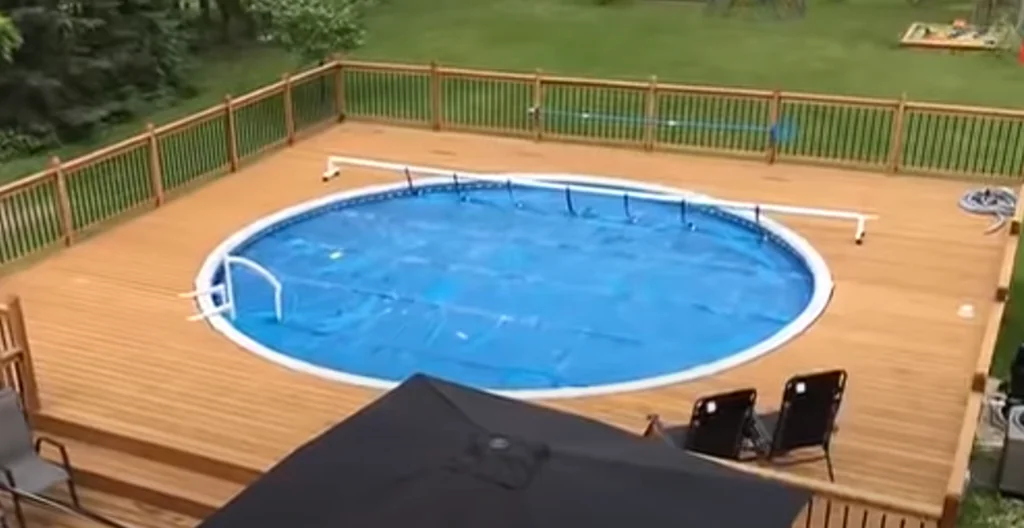
5. How to Build Decking Around a Pool
Before you start building a deck, install the pool and measure it precisely. You want the decking to be as close as possible to the pool. You should use composite materials since they are the most water- and mold-resistant material.
- Run decking boards beneath the pool rails. This will make changing the liner of the pool in the future much easier since you won’t have to cut the decking.
- Install footings and posts
- Install deck framing. The frame should go all around the perimeter of the pool and the posts.
- Connect the outer and inner frame with 2” x 6” beams
- Install diagonal braces between the piers on the inner frame around the pool.
- Lay the decking platform. Leave space between the boards to allow for drainage and expansion, ¼ of an inch should be enough.
- Install the guard rail.
- Build the stairs
- Install a gate. This will prevent children from accessing the pool on their own.
Hopefully, now you know how to build decking for your house. For the final touch, you can consider deck skirting. Enjoy your DIY and see you soon!